How to Clone Your Voice with Play.ht (Step-by-Step Guide)

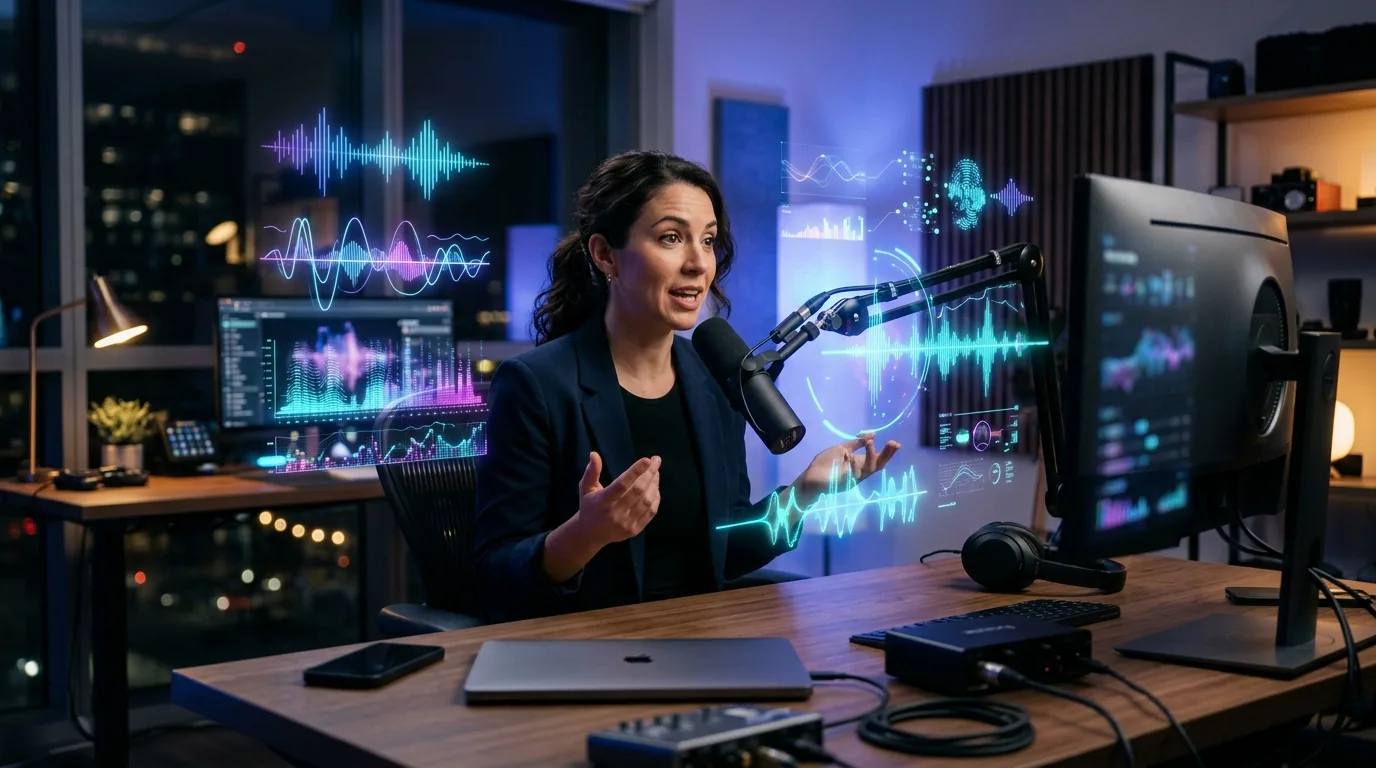
Person speaking into a microphone with AI voice waveform visualizations floating around them, demonstrating Play.ht voice cloning technology

Voice cloning used to be the kind of thing you’d see in a sci-fi movie — expensive, complicated, and slightly creepy. Now? You can do it in under five minutes with Play.ht, and the results are genuinely impressive.

I’ve been testing Play.ht’s voice cloning feature for weeks now (you can read my full Play.ht review here), and I wanted to put together a proper step-by-step guide. Because honestly, the process is simpler than most people expect — but there are a few things you need to get right.

What Is Voice Cloning with Play.ht?

Play.ht uses AI to create a digital replica of your voice. You upload a short audio sample, the AI analyzes your speech patterns, tone, and cadence — and then you can type any text and hear it spoken back in your voice.

It’s not perfect (we’ll get to that), but it’s shockingly close. Good enough for podcast intros, course narration, and internal content — maybe not for audiobooks. Yet.

If you haven’t already, check out Play.ht in our AI tools directory for a quick overview of what it does.

What You’ll Need Before You Start

Before you record anything, gather these:

  • A Play.ht account — the voice cloning feature is available on Pro and Enterprise plans
  • A quiet room — background noise is the #1 killer of clone quality
  • A decent microphone — your laptop mic will work, but a USB mic (even a $30 one) makes a real difference
  • 30-60 seconds of clean audio — more is better, but you don’t need a full monologue

That’s it. No fancy equipment. No audio engineering degree.

Step 1: Log Into Play.ht and Navigate to Voice Cloning

Sign into your Play.ht dashboard. From the left sidebar, click on “Voice Cloning” (it’s under the Voices section).

You’ll see an option to “Create a New Voice Clone.” Click it.

Play.ht will ask you to name your voice clone. Pick something descriptive — like “Jonas Narration” or “Podcast Voice” — because you might create multiple clones for different tones later.

Step 2: Record or Upload Your Voice Sample

This is the most important step. You have two options:

Option A: Record directly in the browser. Play.ht has a built-in recorder. Just hit the red button and start talking. Read something natural — a blog post, a news article, even your grocery list. The key is to speak normally.

Option B: Upload an existing audio file. If you already have a podcast episode, YouTube video, or any clean recording of your voice, upload it as a WAV or MP3 file.

Tips for the Best Voice Sample

  • Speak AI naturally.
  • Vary your tone. Read a mix of sentences — some questions, some statements, some with emphasis. This gives the AI more data to work with
  • Avoid background noise. Close the window. Turn off the fan. Put the dog in another room. Seriously
  • Aim for 30-60 seconds minimum. More audio = better clone. If you can do 2-3 minutes, even better

Step 3: Let the AI Process Your Voice

After uploading, Play.ht processes your audio sample. This typically takes 30 seconds to 2 minutes — depending on the length of your sample and server load.

You’ll see a progress indicator. Don’t refresh the page (I learned that the hard way).

Once it’s done, your clone appears in your voice library alongside Play.ht’s stock voices.

Step 4: Test Your Voice Clone

Now for the fun part. Type a sentence you’ve never said before into the text editor. Something like:

“Welcome to this week’s episode. Today we’re breaking down the five AI tools that actually saved me time this month.”

Hit Generate and listen.

The first time you hear your own AI voice say something you never recorded — it’s a weird experience. Good weird, but weird.

What to Listen For

  • Cadence: Does it sound like you, or like a robot wearing your voice as a costume?
  • Pronunciation: Are common words coming through clearly?
  • Emotion: Does it feel flat, or does it have some of your natural variation?

If anything sounds off, don’t panic — you can improve it.

Step 5: Fine-Tune and Improve Quality

Play.ht gives you a few levers to pull:

Upload more audio. The more data the AI has, the better it gets. If your first clone sounds a bit robotic, try adding another 2-3 minutes of speech.

Adjust the speed and pitch. Small tweaks can make a big difference. Your natural speaking pace might be faster than the default output — adjust until it feels right.

Use SSML tags for precise control. You can add pauses, emphasis, and pronunciation hints if the standard output isn’t nailing certain words.

Step 6: Use Your Clone in Projects

Once you’re happy with the clone, you can use it anywhere Play.ht’s text-to-speech works:

  • Blog-to-audio: Turn your written posts into listenable content — in your own voice
  • Podcast intros and outros: Record them once, generate variations forever
  • Course narration: Narrate entire modules without sitting in front of a mic for hours
  • Video voiceovers: Create consistent narration for YouTube or social media

The export options include MP3 and WAV. You can also embed an audio player directly on your website using Play.ht’s widget.

Common Issues (And How to Fix Them)

“My clone sounds robotic.” Upload more audio. The most common cause is too little training data. Aim for at least 2 minutes of varied speech.

“It doesn’t pronounce my name correctly.” Use the pronunciation guide or SSML phoneme tags. Play.ht lets you specify exactly how to say tricky words.

“The tone is too flat.” Try recording your sample with more emotional range — excited sentences, calm sentences, questions. The AI mirrors what you give it.

“Processing failed.” Check your audio quality. Background noise, clipping, or very low volume can cause processing errors. Re-record in a quieter space.

Is Play.ht Voice Cloning Worth It?

For content creators who produce a lot of audio-adjacent content — absolutely. The time savings are real. Instead of recording every podcast intro, narration, or audio version of a blog post, you type it and generate.

It’s not going to replace a human narrator for a 10-hour audiobook. But for everything else? It’s genuinely useful.

If you’re curious about how Play.ht stacks up against other voice tools, check out our AI tools directory — we’ve reviewed dozens of alternatives across every category.

Bottom Line

Voice cloning with Play.ht is easier than most people think. Record a clean sample, let the AI process it, test the output, and start using it. The whole setup takes less than 10 minutes.

The technology isn’t perfect yet — but it’s good enough for most content creation workflows. And it’s only getting better.


How to Turn Any Image Into a Professional Video Using Free AI Tools

A still photograph transforming into a dynamic video with motion effects showing the AI image-to-video conversion process

From Static Image to Polished Video in Under 10 Minutes

I turned a single product photo into a 30-second promo video last week. No editing software. No video skills. No budget. Just a free AI tool and about 7 minutes of my time.

Here’s the exact process — step by step — so you can do the same thing today.

What You’ll Need Before Starting

Minimal setup. Seriously:

  • One image — a product photo, illustration, screenshot, or even an AI-generated image. JPG, PNG, or WebP all work.
  • A free account on one of the tools below (no credit card needed).
  • A rough idea of what you want the video to show — camera movement, mood, action.

That’s it. If you already have an image ready, you can follow along right now.

Step 1: Choose Your Free AI Image-to-Video Tool

Not all tools are equal. I’ve tested the major options (see our full comparison of free AI image-to-video tools), and here’s what I recommend for this tutorial:

Best for beginners: Kling AI

Kling AI offers a generous free tier — 66 credits daily, which gets you several video generations. The interface is dead simple: upload image, describe what you want, hit generate. The output quality on the free plan is surprisingly good for social media and web use.

Best for quality: Hailuo AI (MiniMax)

Hailuo AI produces some of the most realistic motion I’ve seen from a free tool. The physics are better — fabric moves naturally, lighting shifts convincingly. Free users get a limited number of daily generations, but the quality-per-generation ratio is hard to beat.

Best for control: Runway Gen-3 (free trial)

Runway gives you the most precise control over camera movement and motion. The free trial includes limited credits, but it’s worth burning a few to see what’s possible. Once you understand the workflow, you can decide whether the paid plan makes sense for your volume.

For this tutorial, I’ll use Kling AI since it’s the most accessible. The process is nearly identical across all three tools.

Step 2: Upload Your Image and Write a Motion Prompt

This is where most people mess up. They upload an image and write something vague like “make it move.” That gets you garbage output.

Here’s how to write a prompt that actually works:

The formula

[Camera movement] + [subject action] + [atmosphere/mood]

Examples that produce great results

  • Product photo: “Slow dolly zoom into the product, soft studio lighting shifts from cool to warm, shallow depth of field”
  • Landscape image: “Gentle camera pan left to right, clouds drift slowly across the sky, golden hour lighting intensifies”
  • Portrait/headshot: “Subtle camera push-in, subject blinks naturally, hair moves slightly as if from a gentle breeze”
  • Food photo: “Steam rises from the dish, camera slowly orbits 45 degrees, background bokeh twinkles”

What to avoid in your prompt

  • Don’t describe the image itself — the AI already sees it. Describe the motion you want.
  • Don’t ask for too much action — these tools generate 3-5 second clips. One smooth motion looks professional. Three competing movements look chaotic.
  • Don’t use abstract language — “make it cinematic” means nothing. “Slow push-in with rack focus” means everything.

Step 3: Generate and Evaluate

Hit generate. Wait 1-3 minutes (varies by tool and queue).

When your video comes back, evaluate it on three things:

  1. Does the motion look natural? Watch for warping, especially at edges and on faces.
  2. Does it match your intent? If you asked for a dolly zoom and got a random pan, refine your prompt.
  3. Is the quality sufficient? Free tiers usually output 720p. Fine for social media, might need an upgrade for website headers.

Pro tip: Generate 2-3 variations with slightly different prompts. AI video generation has randomness baked in — the second attempt might nail what the first one missed.

Step 4: Download and Optimize

Download your video (usually MP4). Before posting anywhere, do these quick optimizations:

For social media

  • Trim the first/last half-second — AI video tools sometimes have a “settling in” frame at the start.
  • Loop it — if the motion works as a loop, platforms like Instagram will auto-replay it, boosting engagement.
  • Add text overlay — use your phone’s native editor or a free tool like CapCut. A simple title or CTA makes the video functional.

For your website

  • Compress the file — use a free tool like HandBrake to reduce file size without visible quality loss. Web videos should be under 5MB.
  • Convert to WebM — better browser compression than MP4. Most video compressors handle this.
  • Add a poster frame — set a static image as the video thumbnail so your page loads fast.

Step 5: Level Up With Multiple Clips

One 3-5 second clip is useful. Three clips edited together is a professional-looking video.

Here’s the workflow for a 15-30 second promo:

  1. Shot 1: Wide establishing shot (slow zoom in on the product/scene)
  2. Shot 2: Detail shot (close-up with subtle motion)
  3. Shot 3: Hero shot (the money angle with the best lighting/motion)

Use the same source image or different angles. Stitch them together in CapCut (free), iMovie, or even Canva’s video editor. Add background music from a royalty-free library and you’ve got something that looks like it cost $500 to produce.

Real-World Use Cases (What I’ve Actually Made)

This isn’t theoretical. Here’s what I’ve used AI image-to-video tools for in the past month:

  • Product teasers for social media — static product shots turned into 10-second looping videos. Engagement was 3x higher than the static image posts.
  • Blog header videos — subtle motion on hero images makes pages feel more premium. Takes 5 minutes per post.
  • Email campaign assets — GIF-style product animations embedded in emails. Click-through rates improved noticeably.
  • Client presentations — instead of static mockups, animated concept videos. Clients love this.

When Free Tools Aren’t Enough

The free tiers work for most solopreneurs and small businesses. But here’s when you should consider paying:

  • Volume — if you need more than 5-10 videos per day, free credits won’t cut it.
  • Resolution — need 1080p or 4K output? That’s usually a paid feature.
  • Longer clips — free tiers typically max out at 5 seconds. Paid plans offer 10-15 seconds per generation.
  • No watermarks — some free tools add subtle branding. Paid removes it.

For a deeper dive into which paid plans are actually worth it, check out our best AI video generation tools comparison. And if you’re curious about how these tools compare to what was available just last year, our 2025 vs 2026 video tools comparison shows how dramatically the quality has improved.

Start With One Image Today

Seriously — grab any photo from your phone, sign up for Kling AI’s free tier, and follow steps 2-4 above. The whole process takes under 10 minutes, and you’ll immediately see whether AI video fits into your content workflow.

Once you’ve got the basics down, explore the full range of AI tools in our directory — there are tools for every step of the content creation process, from ideation to publishing.

The barrier to professional-looking video content just dropped to zero. The only question is whether you’ll take advantage of it.

All-in-One SEO Software That Actually Tells You What to Fix

Solopreneur using all-in-one SEO software with actionable fix recommendations displayed on a modern dashboard

Most SEO Tools Show You Problems — The Best Ones Tell You How to Fix Them

Here’s what frustrates me about most all-in-one SEO software: they’re great at showing you what’s broken. Red flags everywhere. Scores dropping. Rankings tanking.

But then what? You’re staring at a dashboard full of warnings with zero guidance on what to actually do about them.

That’s the gap I wanted to close. I spent the last few months testing SEO platforms that don’t just audit — they recommend. Tools that look at your content, your technical setup, your keyword strategy, and say: “Here’s exactly what to fix, in this order, to move the needle.”

If you’re a solopreneur or small business owner who doesn’t have an SEO team on speed dial, these are the tools worth your attention.

What “Actionable Recommendations” Actually Means

Let me be specific. I’m not talking about tools that tell you “your page speed is slow.” That’s a diagnosis, not a recommendation.

Real recommendations look like this:

  • “Add the keyword all in one seo software to your H2 — it appears 0 times but competitors average 2.”
  • “This page is cannibalizing traffic from /your-other-page/. Merge them or add a canonical.”
  • “You’re missing schema markup. Here’s the exact JSON-LD to add.”
  • “These 5 internal links would boost your topical authority for this cluster.”

That’s the standard I held these tools to. If the software couldn’t tell me what to change and why, it didn’t make this list.

1. SurferSEO — Best Content-Level Fix Recommendations

SurferSEO is the gold standard for content optimization with actionable guidance. Its Content Editor doesn’t just score your content — it tells you exactly which terms to add, how many times, and where your structure falls short compared to top-ranking pages.

What it actually recommends:

  • Specific NLP terms to include (with target counts)
  • Ideal word count, heading count, and paragraph structure
  • Image suggestions based on competitor analysis
  • Internal linking opportunities you’re missing

The Audit feature is where it really shines for existing content. Point it at any published page and it generates a prioritized list of fixes — ranked by potential impact. That’s not just data. That’s a to-do list.

Best for: Content creators and bloggers who want line-by-line guidance on what to write and rewrite.

2. Frase — Best for Research-to-Recommendations Pipeline

Frase takes a different approach. Instead of starting with your existing content, it starts with what’s already ranking and reverse-engineers the gaps.

You enter a keyword, Frase pulls the top 20 results, and builds a comprehensive brief showing exactly what topics you need to cover. But here’s the part most people miss — it also analyzes your existing page against that brief and highlights what’s missing.

The recommendation engine tells you:

  • Which questions your competitors answer that you don’t
  • Topic clusters you’re ignoring entirely
  • Headers and sections to add for better topical coverage
  • Word count targets based on actual SERP data (not arbitrary rules)

Best for: Writers who want research-backed content recommendations before they start writing — and a checklist to optimize after.

3. Scalenut — Best All-Rounder With Step-by-Step Guidance

Scalenut is the all-in-one SEO software with recommendations that surprised me most. It combines keyword research, content planning, writing, and optimization into a single workflow — and each step comes with explicit next-action suggestions.

Its Cruise Mode is particularly useful. You give it a keyword, and it walks you through topic selection, outline creation, and content generation with recommendations at every stage. It’s like having an SEO consultant built into your writing tool.

What sets it apart:

  • Keyword clustering with priority recommendations
  • Content briefs that include “must-cover” topics
  • Real-time NLP scoring as you write
  • Fix suggestions for underperforming published pages

Best for: Solopreneurs who want one platform that handles the entire content-SEO workflow with built-in guidance. Check out our full breakdown of the best all-in-one SEO tools for solopreneurs for more options in this category.

4. Alli AI — Best for Automated On-Page Fixes

Alli AI takes the “recommendation” concept one step further — it doesn’t just tell you what to fix, it can fix it for you.

Connect your site and Alli AI crawls every page, identifies on-page SEO issues, and generates specific fixes. Title tags too long? It suggests new ones. Missing meta descriptions? Written and ready. Schema markup absent? It generates the code.

The best part? You can auto-deploy fixes without touching your CMS. One click and the optimization goes live. For small business owners who aren’t comfortable editing HTML, that’s a game-changer.

What it recommends and can auto-fix:

  • Title tags and meta descriptions (rewritten, not just flagged)
  • Schema markup injection
  • Internal link suggestions with anchor text
  • Canonical tag and redirect recommendations

Best for: Business owners who want SEO improvements applied automatically — not just reported.

5. SEOwind — Best for AI-Driven Content Recommendations

SEOwind focuses specifically on content recommendations powered by SERP analysis. It studies what’s ranking, identifies patterns, and generates detailed content briefs that tell you exactly what to write.

Unlike tools that give you a keyword and wish you luck, SEOwind breaks down the structure of winning content: which headings work, what questions to answer, which secondary keywords to weave in, and how deep to go on each subtopic.

Best for: Content strategists who want data-driven outlines with clear instructions on what each section should cover.

6. GetGenie AI — Best WordPress-Native Recommendations

If your site runs on WordPress (like most of the tools in our directory), GetGenie AI deserves a look. It’s a WordPress plugin that brings SEO recommendations directly into your editor.

No switching tabs. No copying data between platforms. You write in WordPress, and GetGenie analyzes your content in real time — suggesting keyword placements, content gaps, and structural improvements right in the sidebar.

What it recommends:

  • SERP-based content scoring with specific fix suggestions
  • Competitor content gap analysis
  • Keyword density and placement recommendations
  • AI-generated content suggestions to fill gaps

Best for: WordPress users who want SEO guidance without leaving their editor.

How to Choose the Right Recommendation-Focused SEO Tool

Here’s my honest framework for picking the right one:

If you mainly write blog content → SurferSEO or Frase. Both give you word-level guidance that makes your content measurably better.

If you want everything in one place → Scalenut. Research, writing, optimization, and recommendations in a single workflow. We also compared the top all-in-one SEO software platforms head-to-head if you want the detailed breakdown.

If you want fixes applied automatically → Alli AI. Especially if you’re not technical and don’t want to edit code.

If you’re on WordPress → GetGenie AI for in-editor recommendations, or AIOSEO if you need a broader SEO plugin with recommendation features.

What About Ahrefs, Semrush, and Moz?

Fair question. These enterprise tools are excellent at data collection and competitive analysis. But their recommendation engines are more passive — they flag issues and leave the interpretation to you.

That works great if you have an SEO specialist on staff. But if you’re a solopreneur managing everything yourself, you need tools that close the gap between “here’s a problem” and “here’s how to solve it.” That’s what the tools on this list do.

For a broader look at the all-in-one SEO landscape — including the big names — check out our complete guide to all-in-one SEO for small business owners.

The Bottom Line

The best all-in-one SEO software in 2026 doesn’t just show you dashboards and scores. It tells you what to fix, why it matters, and — in the case of tools like Alli AI — does it for you.

Stop paying for tools that generate reports you don’t know how to act on. Start using ones that tell you exactly what to do next.

Want to explore more AI-powered tools for your business? Browse our full AI tools directory — we’ve tested and reviewed over 160 tools across every category.